Fun Kids’ Lollipop Sugar Flowers


If you love the idea of combining crafting and sugar, then you will enjoy this sweet activity! I have given you a step by step tutorial of how to do this activity with the least amount of tools and stress!
The Ingredients & Tools Needed For This Sweet Craft
For each child you will need:
- clean glue stick with its lid
- any colour gum paste (molding sugar)
- small lollipop
- plastic cling wrap
- shaker with flour inside
- thin paint brush
- cup of water
- Styrofoam
Lay out these tools and ingredients on your table so it is easy to reach.


Tutorial On How To Make Your Lollipop Sugar Flower
I will give you simple instructions with an image underneath to guide your activity, but feel at ease to adapt it where you feel it may work better for you.
1. Roll the gum paste
Knead the gum paste to form a soft workable consistency. Lightly flour your clean surface, then using the glue stick container, roll the ball of gum paste into thin flat sheet (not too thin).


2. Cut circles into the gum paste
Use the lid of the glue stick, and press circles into the gum paste sheet. Once you have used up the space on the gum paste sheet, gently take a circle and push it in your palm with a finger. Try to make it flatter by pushing the edges and center. You may also just press it in between your fingers to create a flatter circle and a more petal like effect.


3. Wrap the petals around the lollipop
Apply a wet brush tip to one side (bottom) of the petal. Do not make it too wet or else the gum paste falls apart. Then wrap the petal from the bottom of the lollipop. Do the same with the remaining petals, overlapping them each time around the lollipop.


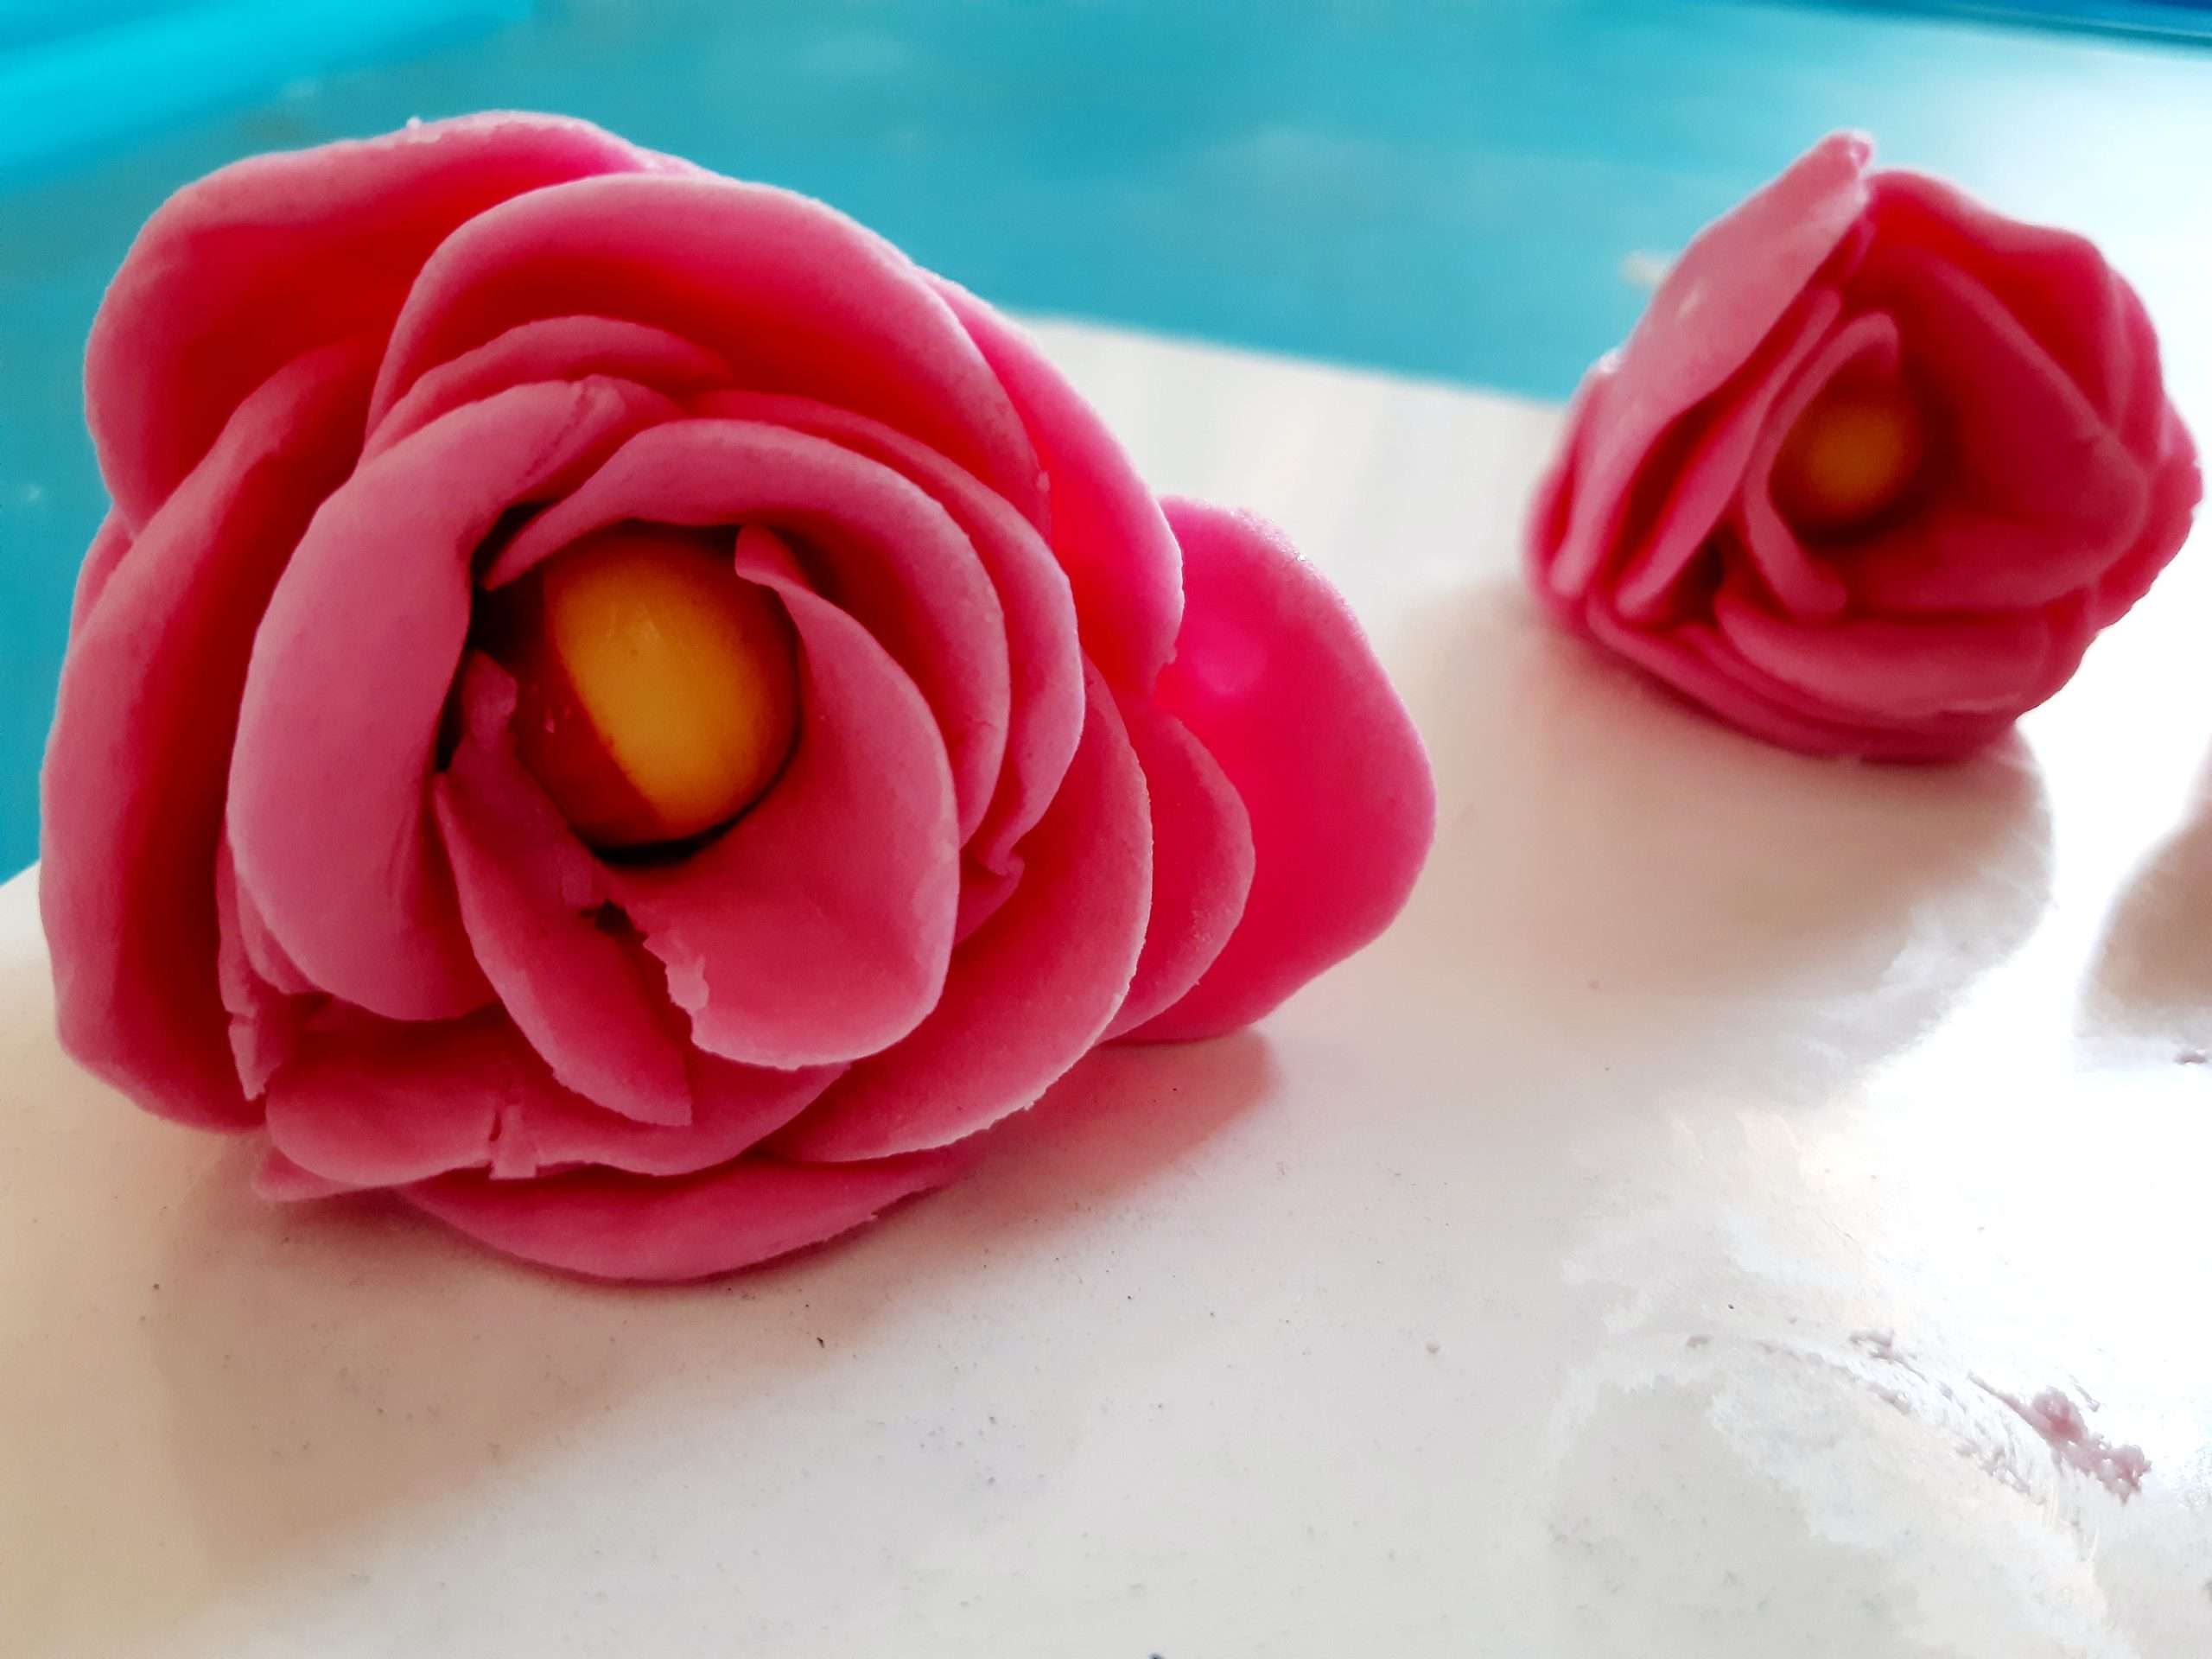
4. Complete the flower and dry it out
Continue to cut out more petals and repeat the above steps. Wrap the petals around from the bottom, overlapping them each time.
Once your flower is at your desired size, dry it out by sticking it in Styrofoam and hanging it upside down overnight.


It is a good idea to keep uncovered gum paste under cling wrap while working, to prevent it from drying it out
5. Eat your flower!
My kids couldn’t wait for overnight; they ate their flower on the same day after a few hours! Now eating dried out gum paste is not particularly my favourite treat, but kids love anything that they have created, especially when it looks beautiful.
I like to keep it short and simple, so hope you and your kids love it as much as mine did!